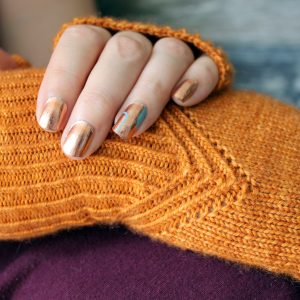
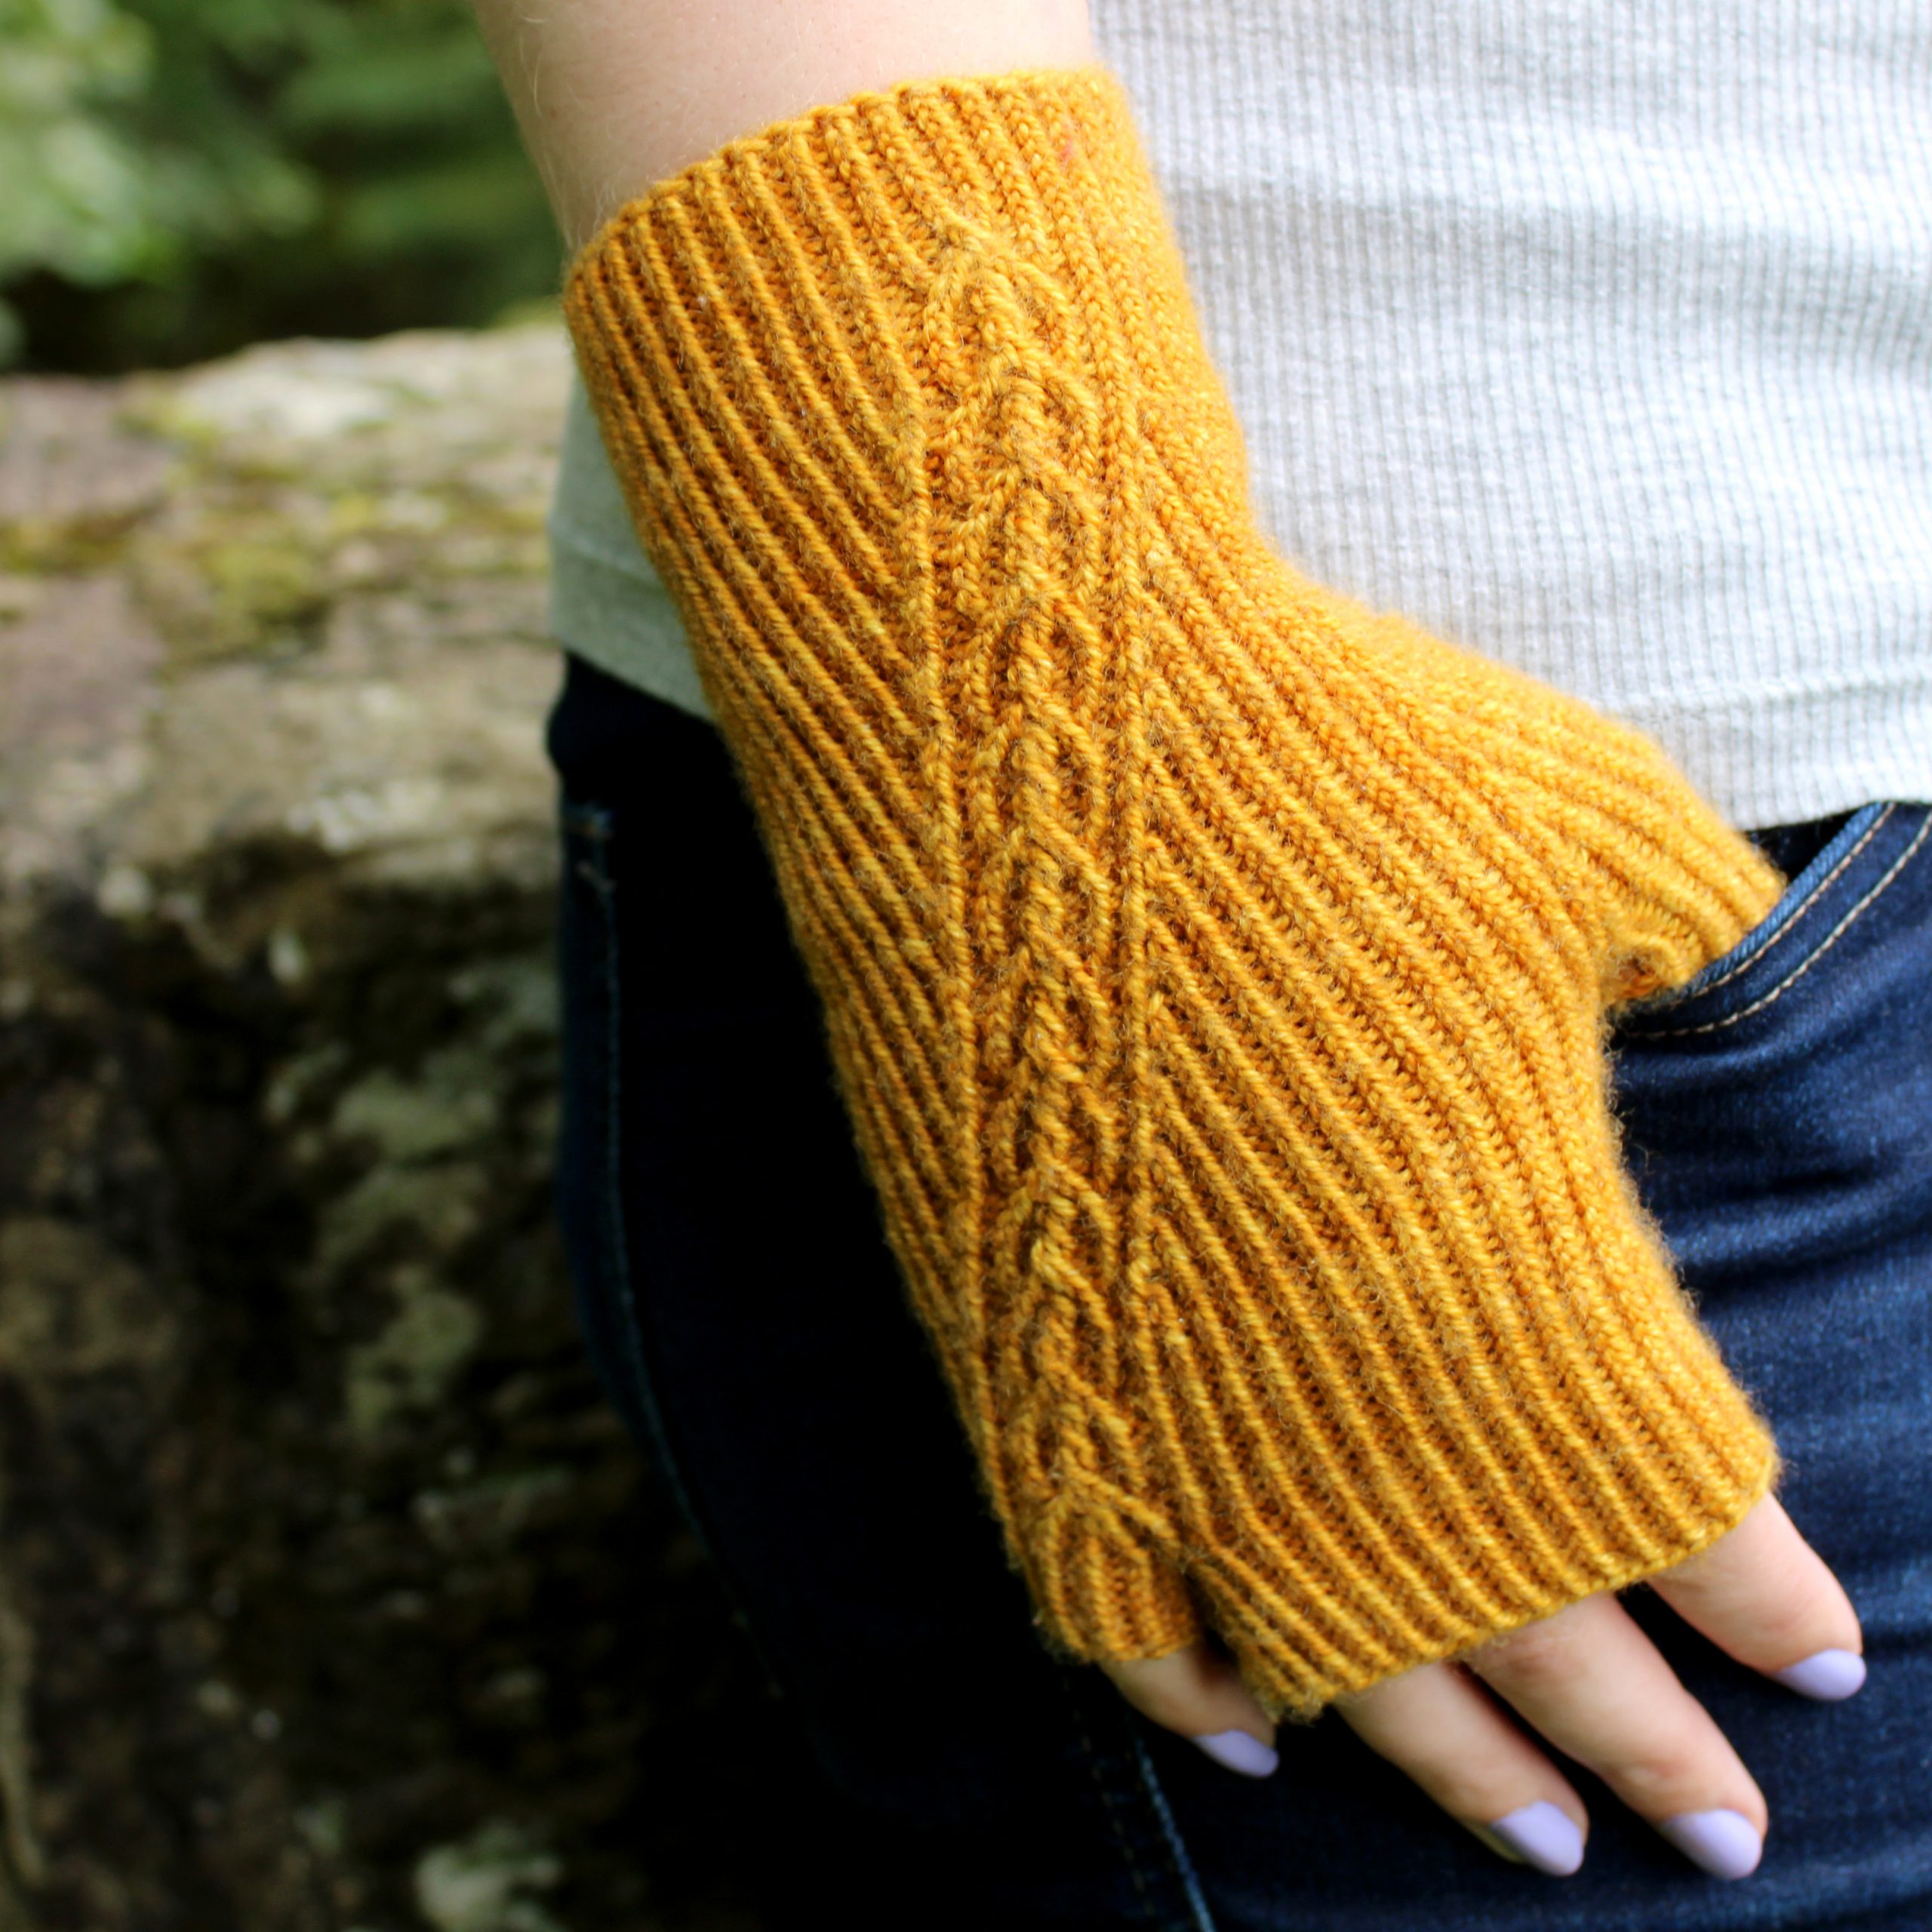
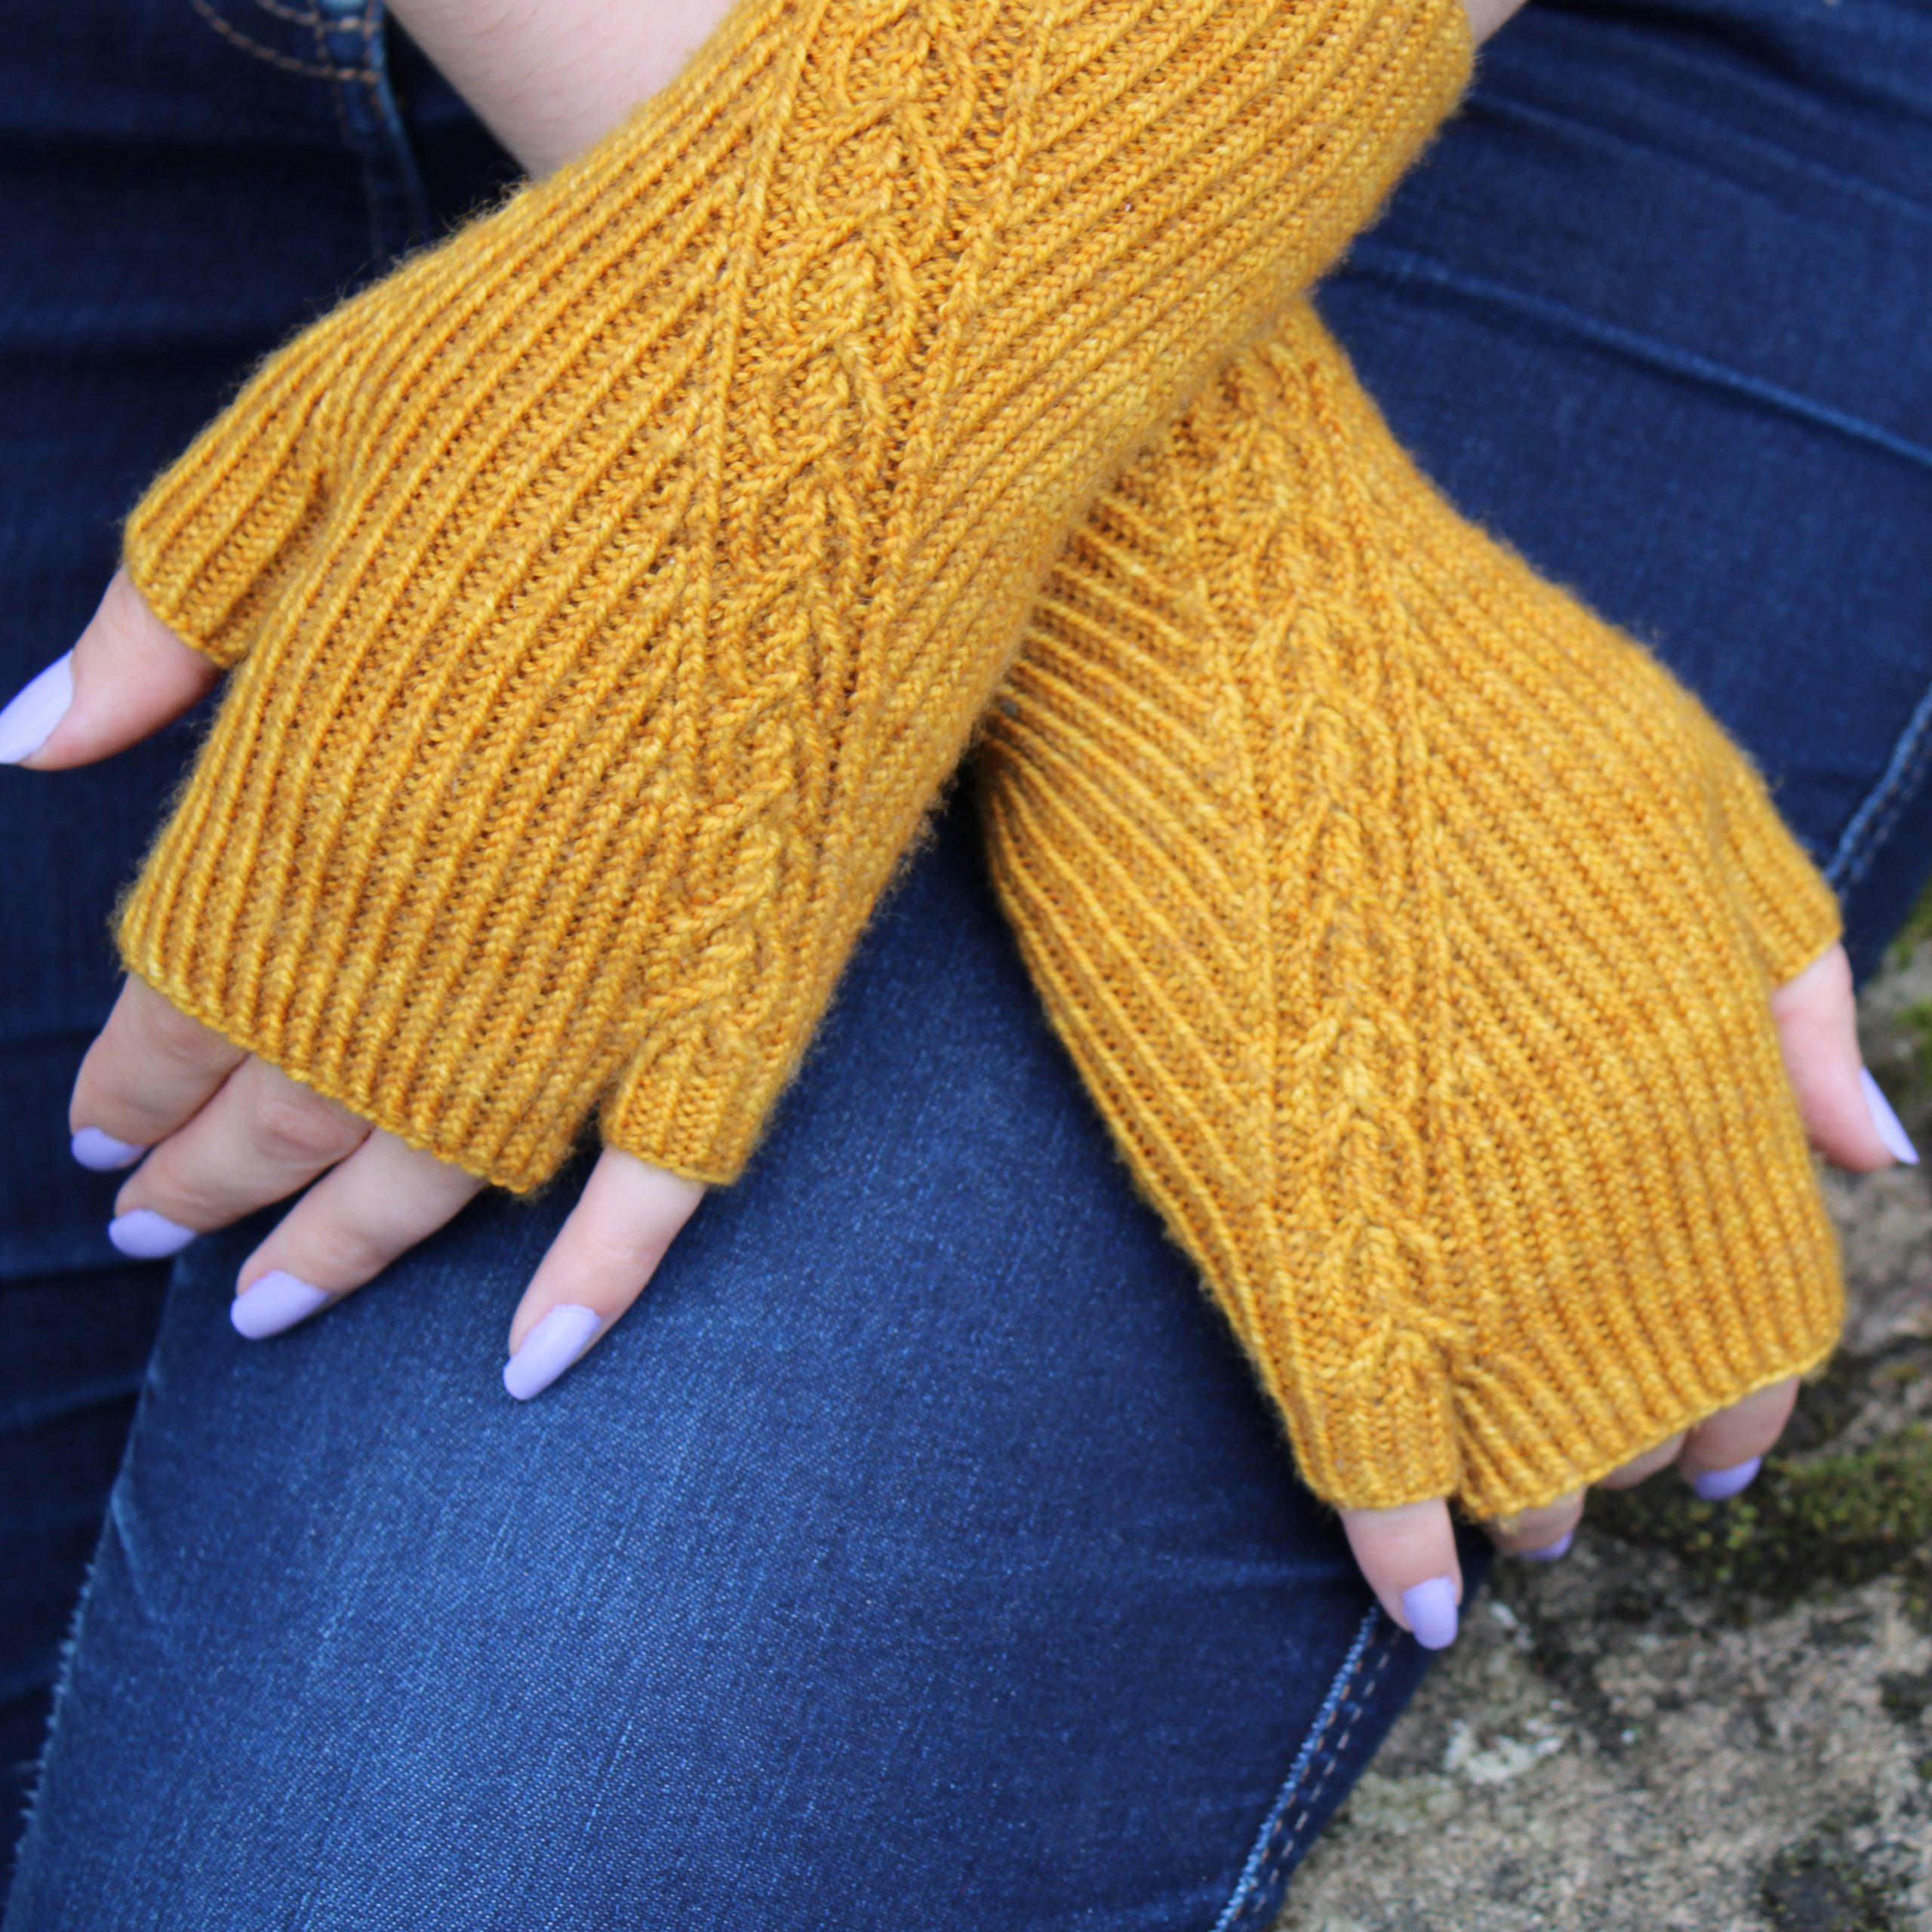
 I’m so happy to be showing you these mitts at last! They were so much fun to knit. I thought today I’d give you a quick rundown on the design process and how this pattern came to be. It always starts with a sketch in my book. I’m not sure what the inspiration was, but I sketched out the outline of the mitts and scribbled down some details about the pattern. You can see that originally the idea was for the cable to move from the outside of the hand towards the thumb, but when I got a little further through the process I switched it so it travels to the little finger. I picked up the most amazing yarn for this pattern – Eden Cottage Yarns Hayton 4ply – super soft thanks to the merino and luxurious cashmere with a little nylon for toughness – perfect for these hard-working mitts.
The next stage was choosing the cable and that took ages! I had a couple of swatches with many different options on each, but eventually, I made a choice. This is the point where the gauge swatch and the pattern writing begins! Luckily for me, my gauge came out the same as for Nicnevin so I got a shortcut on the maths and could jump straight into the charting. I always chart out my pattern on the computer before I start knitting – then I can save it as a pdf and have it handy on my phone at all times.
 This is where the real fun begins – the knitting! I have to fit in knitting whenever I can in the quiet parts of the day – mostly if we’re having cuddle time on the sofa and once my kids are in bed. At one point I planned to make this into fingerless gloves instead of mitts, but having done the left hand I wasn’t satisfied with the finger placement, so with the right hand I just separated the pinky to help hold the glove in place on that side. You can skip this step if you like! Having ripped out the fingers on the left hand, I procrastinated for a week or two on redoing the cuff!
After knitting the right hand, it was pattern writing time! First I had to grade the gloves into a larger size and decide how I was going to present the charts. I like to keep my charts to as few pages as possible, so it was a little bit of a challenge to fit each hand onto just one page. Stitchmastery takes the charts I’ve made and gives me written patterns, which is a nice shortcut, however the written instructions it gives me are nowhere near publishable! I have to go through and consolidate things like: (K tbl, p) x 8, (k tbl, p) 4 times, (k tbl, p) x 4, into (K1 tbl, p1) 16 times and then put in the repeats for the large size. With each glove having more than 70 rounds, it took me about a week to get this stage ready to be tech edited!
Tech editing is always a little nerve-wracking – you send off your new baby and hope it doesn’t come back with too many red marks! I always send off my pattern in the best state I can get it to, but there was no chance of getting this one back error-free! After I make the fixes from the first round of tech editing, I get testers for the pattern. This is always super fun! I love to see my patterns being knit by other people. My testers were really helpful – picking up a few errors that had slipped through the net, and suggesting other little improvements. One notable change was that a tester couldn’t find a video for the cast-on I’d specified, so I went through my cast-ons book, found another name for the same cast-on and then I found loads of videos for the Estonian Cast-On. During the testing process, I usually find the time and good weather for a photoshoot.
Once testing is done and I stop getting suggestions from my testers, I make sure all the errors are fixed, incorporate the suggestions I like and send the pattern back to Jo for a final review. Finally it’s time for setting up my Ravelry and LoveKnitting pages, drafting my newsletter and blog, and getting all my social media announcements ready. My husband sets up the page on my website, and once our kids are in bed I can finally hit publish, and send everything out!
Want to see what I’m working on now? Check out my instagram account for sneak peeks! Or sign up to my newsletter to hear about my new releases (and get an exclusive discount!) just enter you email address on the right!